Posted on Leave a comment

AG Ninja Goes to Austin

AG Ninja had a blast installing a state of the art ninja facility at Austin Ninjas in Austin, Texas in January 2018. AG Ninja worked directly with Austin Ninja to custom design their available space. From there, AG Ninja provided our own manufactured equipment as well as installation. With multiple obstacles of varying difficulty, this Ninja facility is able to accommodate Ninja trainees of all ages. Notably, Austin Ninja is the training home of Ninja Warrior competitors Rick Hinnant and Damir Okanovic, and it has been an amazing project to watch unfold with real results seen live on ANW! Check out the images below to see the magic come to life in this premier ninja facility!


Below is a video of Brad Thornton (Chief Operations Officer/Designer/Co-Owner) demonstrating how to tackle the AG Ninja Salmon Ladder at the Austin Ninja facility.


Posted on Leave a comment

Ninja Training Finding It’s Way In to Fitness

Gym_Design_With_Ninja_Training

More and More, we are starting to see people in the fitness industry come to us with an interest in Obstacle Training. Why? Because Obstacle training is one of the most exciting and fun ways to get a full body workout. On top of that, it’s great for all ages.

It is so important to look forward to your daily training regiment. Dreading a workout is no fun. In short, Obstacle training is fun! Recently we have worked with several fitness facilities who were opening new locations and wanted to dedicate a substantial amount of space to Ninja. Some of the facilities are even going as far as creating several different Ninja areas, each catering to different age groups and skill levels. The video below shows a design we created for a customer that was looking to do that very thing.

Do you blame them? Seriously, would you rather do 10 pull-ups or rip through a set on the salmon ladder? Same muscles being worked but I can assure you one is a lot more fun than the other. We have over 60 other obstacles each which targets a certain muscle group or multiple groups depending on how they are used. You can check out the selection HERE!


Posted on Leave a comment

AG Ninja’s Newest Obstacles

Releasing new obstacles is always an exciting thing for me. Seeing them go from a 3D mockup to hanging from someone’s Katana Frame provides such a sweet satisfaction.

Here are the latest releases from AG Ninja:
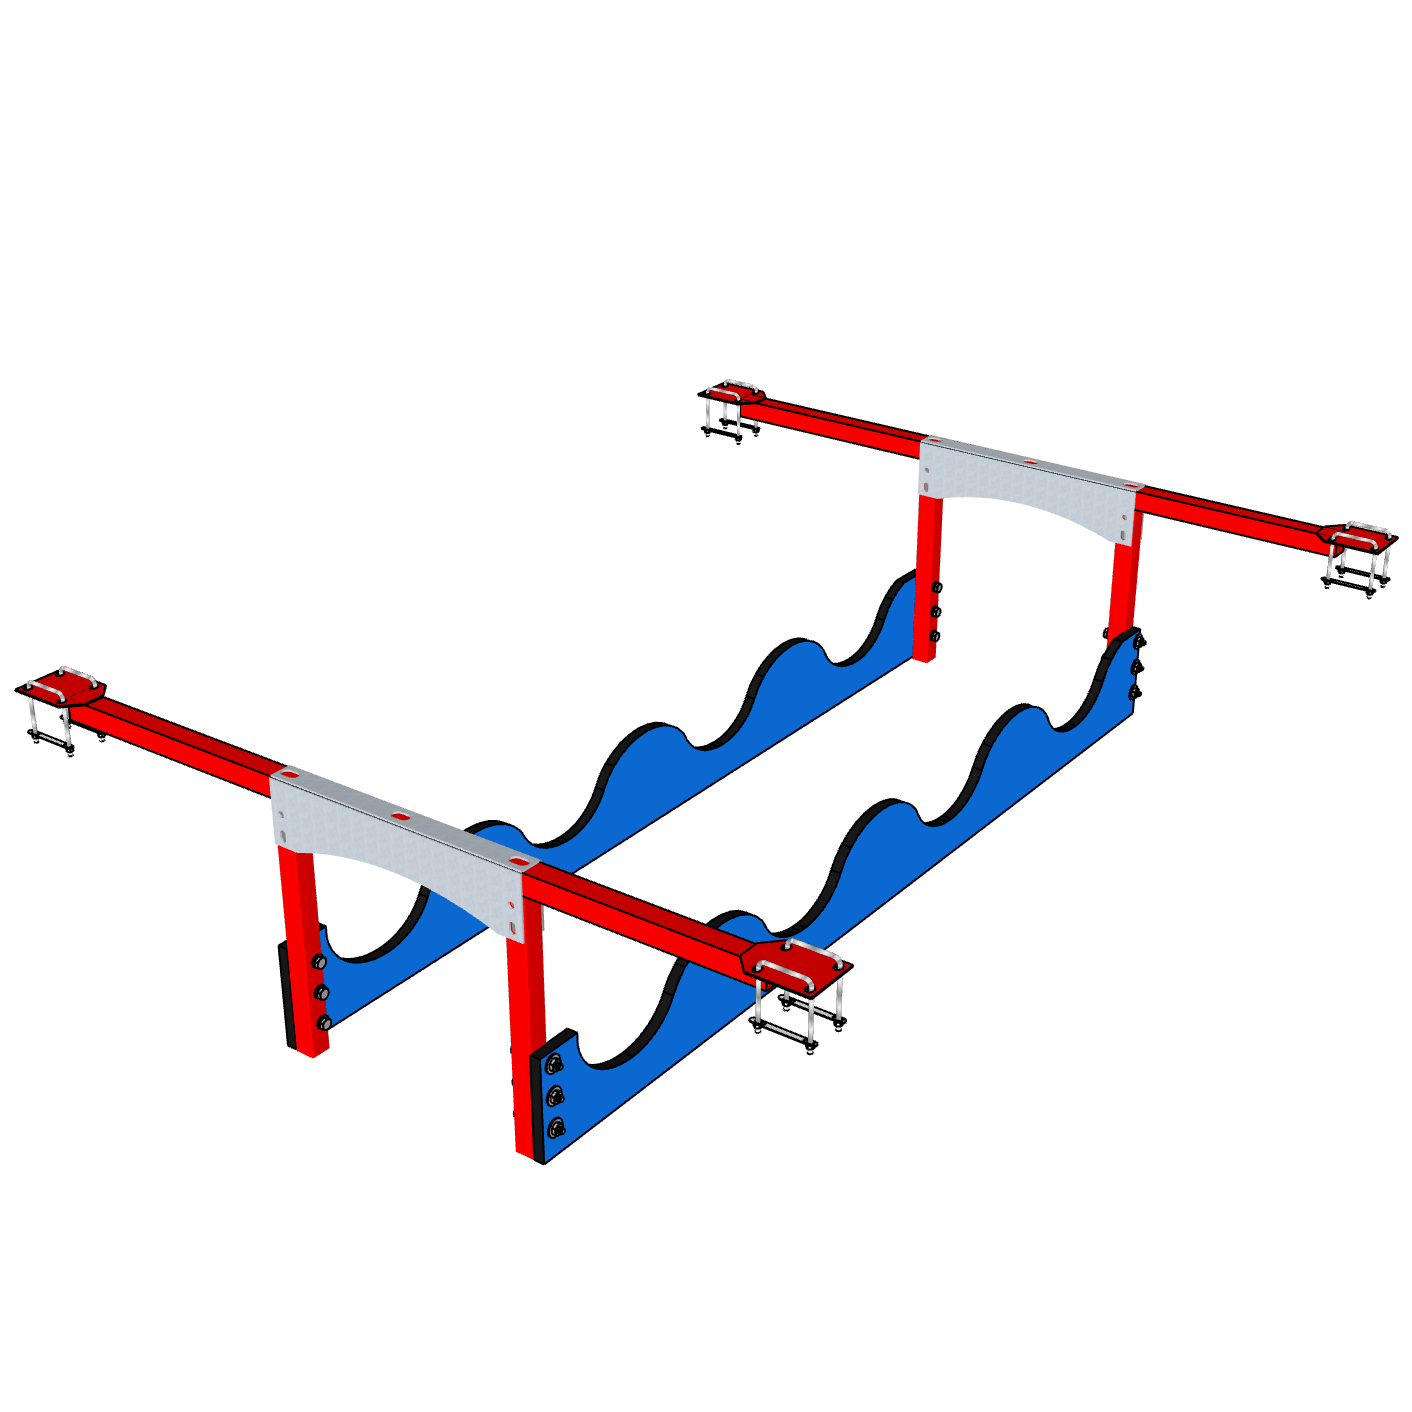
The Revolver

Price: $1175

Difficulty: Advanced Ninja

Age Range: Teen – Adult

Material: Powder Coated Steel

Body Parts Worked: Biceps, triceps, back, shoulder, grip strength

ninja-Obstacle-the revolver

You’ve seen the rumbling dice and the rotating spindle. Now comes The Revolver. This unique obstacle combines a myriad of challenges that will test the will power of the best athletes. Similar to the rumbling dice, one must do a pull/push motion with both arms on the Revolver rungs to get the heavy piece moving. However, The rungs of this obstacle provide their own challenge as they increase in thickness. Yes, thicker definitely means more difficult!

If you already have rails for a Rumbling Dice, you have the option of purchasing the Revolver as a stand alone obstacle.
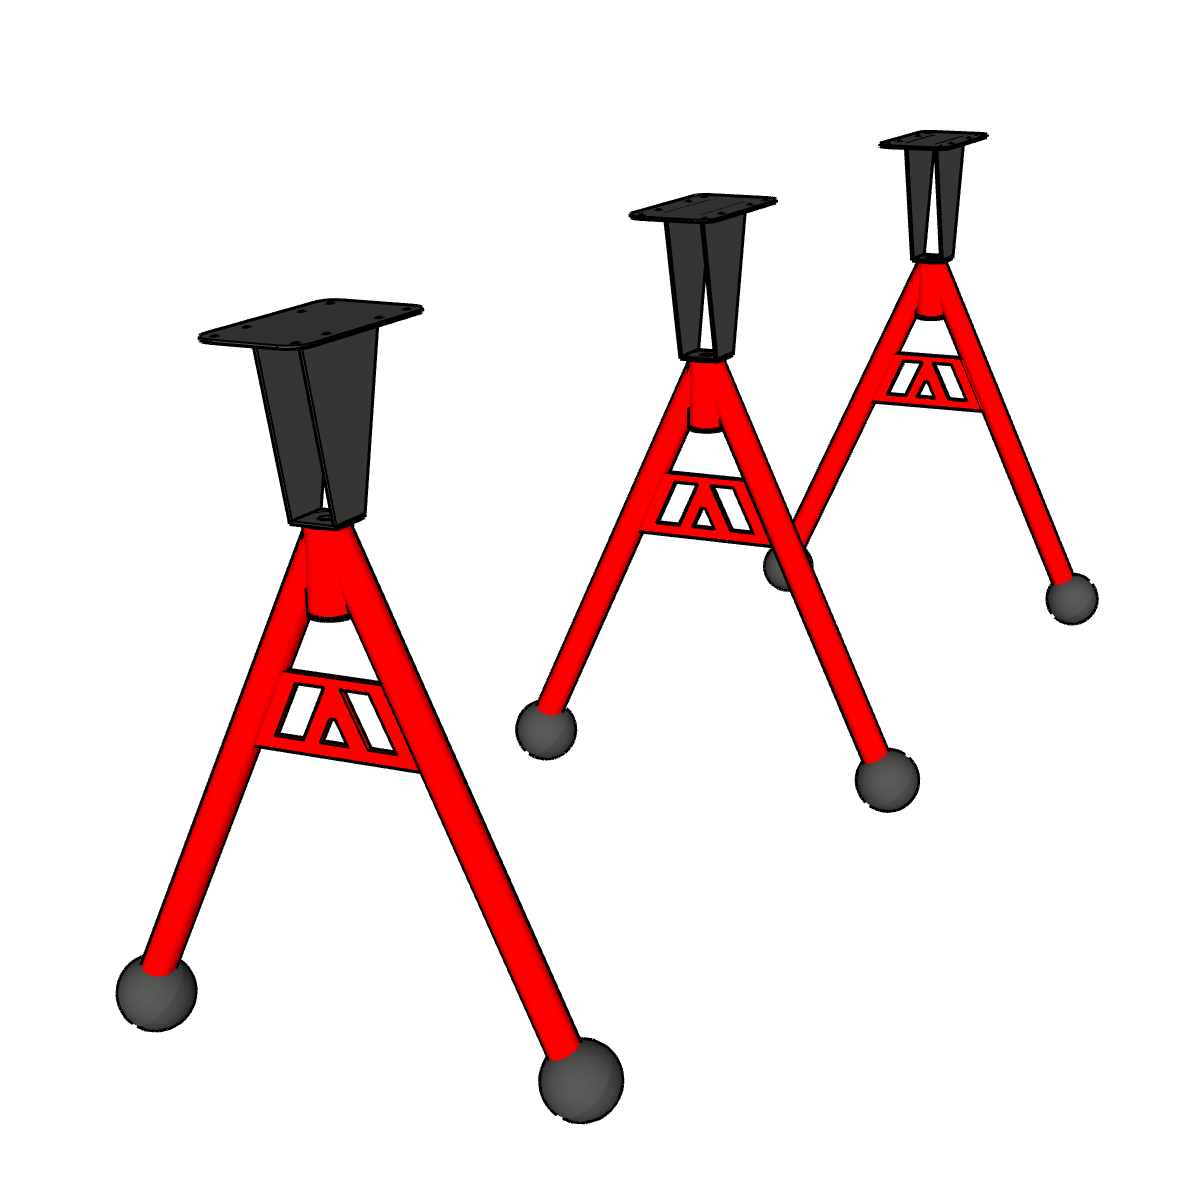
 

The Wishbone

Price: $315 ea.

Difficulty: Advanced Ninja

Age Range: Teen – Adult

Material: Powder Coated Steel, polyurethane grips

Body Parts Worked: Biceps, triceps, back, shoulder, grip strength


It’s hard enough when an obstacle rotates on you, but when it swings and rotates, you have a problem on your hands. The athlete will get to test grip strength, upper body strength, core and the lechè skills with this obstacle. The wishbone is made of a powder coated steel and will include cannon balls on the ends to assist with the grip.


The Tic Toc Bag

Price: $795

Difficulty: Beginner/Intermediate

Age Range: 5 to Adult

Material: Vinyl padding, Powder Coated Steel, plastic base

Body Parts Worked: Biceps, Calfs, Quads


ag_ninja-tic_toc

The Tic Toc bag provides a great deal of fun and versatility. A common use is to release from another obstacle and bear hug the bag and fight to hold on as it sways back and forth. So, you will often see a trapeze placed before this obstacle to get some high flying excitement. The soft padding is quite forgiving with it’s 2ft diameter and vinyl covering. The plastic base provides some needed support for foot placement.  The obstacle is about 7.5ft tall and 3ft wide
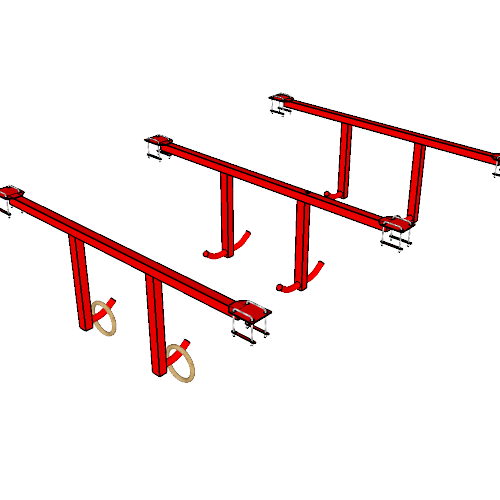
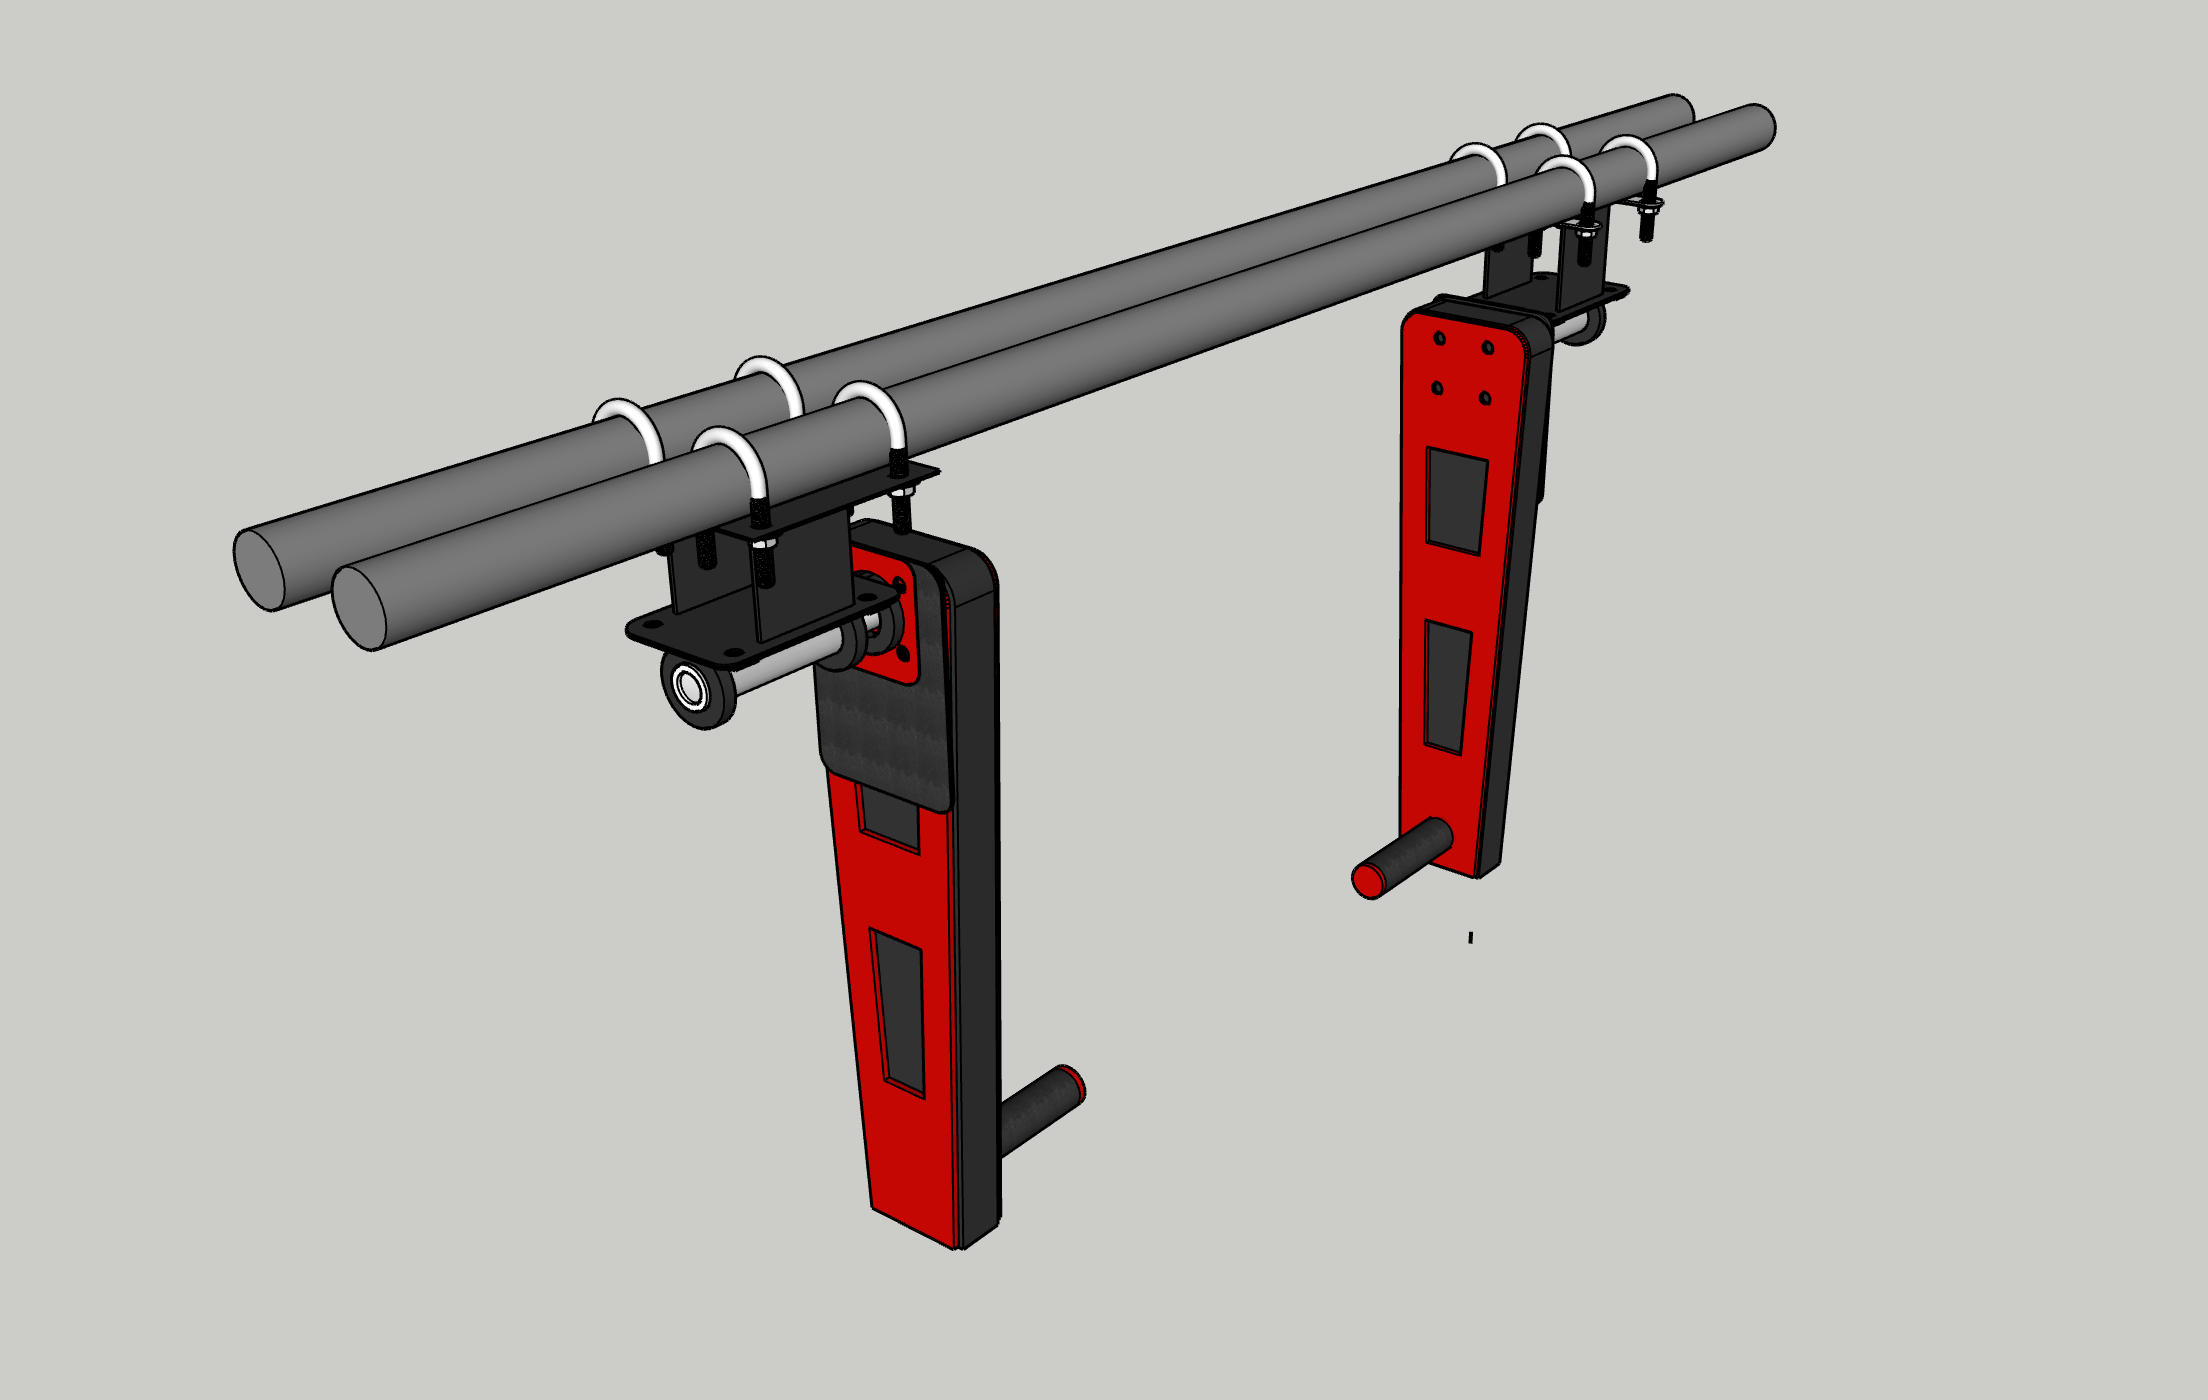
 

The Cobra

Price: $775

Difficulty: Intermediate

Age Range: 8 to Adult

Material: Powder Coated Steel

Body Parts Worked: Biceps, back

The_Cobra_ninja_Obstacle

Like a slithering Cobra, this obstacle rolls up and down and finishes with a climb to the raised head. Participants simply walk their hands along the back of The Cobra and try their best to avoid the venom! This obstacle works upper body and grip strength and would be considered intermediate level. Included are the rolling poles, mounting sticks and hardware.


The Flying Monkey

Price: $675 ea.

Difficulty: Intermediate/Advanced

Age Range: 12 to Adult

Material: Powder Coated Steel, Plastic Veneer

Body Parts Worked: Biceps, back, abs

Flying_Monkey_ninja_Obstacle

One of the newest obstacles added to the AG Ninja arsenal not only brings excitement in it’s functionality, but it’s also beautifully crafted with a lot of attention put in to the design.  Outside of creating obstacles that are safe and professionally engineered, we really want to focus on designing items that look great. The Flying Monkey does not disappoint!

One of the more popular obstacles from the TV show, the Flying squirrel allows the athletes to get HUGE air while swinging from one to the next. In a structured obstacle training environment, the flying squirrel can be used for a massive age range in that it’s great for training taps/correct swing and release techniques.

When used in a course running environment, this would be considered a high level obstacle for very experienced athletes

Brad Thornton

Posted on Leave a comment

AG Ninja Goes to Windy City

AG Ninja just wrapped up another successful install outside of Chicago for a customer opening their second location. With all projects, new ideas and different challenges present themselves which, in my opinion, makes it a load of fun. While it can be a little stressful at times, these situations call for creative thinking and team work to provide solutions. In the end, things always seem to work out nicely and the customer is left with a beautiful training facility.

We began the project with our usual consult with the customer to determine the type of training environment (structured or open gym) and target age groups. From there we dove in to space planning. We obtained blueprints of the building and did a 3D mockup of the space. At that point, the fun started and we began designing a Ninja course, focusing on the various age groups our customer wanted to accommodate. Some of the obstacles we worked in were the Flying Monkey (known as flying squirrel to most), flying rings, the flying bar trainer, double salmon ladder etc. The great thing about how we design for our customers is we incorporate all the little details about the actual look of everything so the customer can get a true glimpse at what their gym will look like. We always include custom color schemes, logos, flooring etc.

After we determine everything a customer wants to do will actually fit within the space, we present it to them and go over everything in detail. 9 times out of 10, projects such as this one involve a good bit of customization of matting padding and even framing sizes. So, we have hundreds of small measurements we have to determine and pay close attention to. We literally check over it a good 5 or 6 times to ensure accuracy. One mistake can be quite costly!

Once we get the green light from the customer, it’s off to production. 6 Weeks later, the install team shows up and starts piecing together everything you will see in the video below. The result is what makes our jobs amazing!


If you need a consult on your Ninja facility or obstacles or just want to chat, please contact me!

Brad Thornton

Chief Operations Officer/Designer/Co-Owner

Brad@InteractiveSportsZone.com


Posted on Leave a comment

Sport Obstacle Highlight – The Flying Rings

Flying_Rings

No, we certainly don’t have a shortage of “Flying” obstacles. Can you blame us? Who doesn’t like to soar through the air, reaching for a bar, a pipe, rings, whatever? You miss, you land on a big soft resi or in a foam pit. Fun times. I literally spend a good 30 minutes each day just trying to think up different new flying obstacles. So, in comes the flying rings!

We’ve been offering this one for a while but we haven’t really given them their fare share of attention. The obstacle is personally one of my favorites and I often try to encourage clients to consider them. Yes, they appear to be difficult, but once again, like many of our obstacles, there are a number of ways to use them.

First off, if you watch the show, the obstacle is designed a little differently then what you might expect. Instead of tethering the rings and having the athlete essentially jungle swing from rung to rung, we kept the rings free. In addition, we went with pairs of hooks and rings instead of singles. So, this requires one to swing with both rings in hand and lechè over and loop on to a set of hooks with the rings. Not only does this require body control and precise technique, but it also really brings in the element of mental focus . Once you have launched yourself in to the air, you now have to hone in on these small hooks and stay completely focused on them so that you have a shot at latching on to them with your rings.

“Wait!” you say…”That sounds hard!”

It is! But there are many ways to make it more Ninja novice friendly

  1. With your youngsters, you can slide the rungs closer together and use the obstacle as more of a ring toss. In other words, the athlete is still hanging from one ring on a peg as they are reaching for the peg across from it.
  2. You can also start them out on swings only while holding on to both rings – working the proper tapping technique and getting accustomed to the grip strength required to hold on with the extra force from the swing. From there, the athlete can ease in to a swing and release everything all together (including the ring), landing on a resi or in a pit. Next, they can release with ring in hand, learning to get it up and over the bend in the rung. And so on.
  3. The rungs are designed in such a manner to also allow your athletes to use a bar in lieu of the rings if needed. A bar will be easier in that it requires a little less precision than the rings. So you can have them perfect this before graduating to the rings.

If your more experienced Ninjas need an extra challenge, space the rungs further apart or have them perform the obstacle with one ring only (both hands on one ring). Have them face the opposite direction when they begin so that they have to turn 180 degrees mid air to make the catch. So many ways to do it!

Remember, obstacles like the flying rings can put your athletes in extremely vulnerable positions (including upside down!). It is important to mat appropriately. With obstacles such as this, you will want to go thicker on the safety mat than you would with say a monkey bar at the same height.

Train safely and email with questions or comments. Below is a quick video showing the flying rings.


Brad Thornton

Brad@american-gymnast.com

Posted on Leave a comment

Sport Obstacle Highlight – The Flying Squirrel

Flying_Squirrel_Obstacle_2

One of the newest obstacles added to the AG Ninja arsenal not only brings excitement in it’s functionality, but it’s also beautifully crafted with a lot of attention put in to the design.  Outside of creating obstacles that are safe and professionally engineered, we really want to focus on designing items that look great. Let’s face it, when your customers walk in to your facility, you want them to take one look at your equipment and think “whoa, that is really nice!” No doubt, this was achieved with the release of the Flying Squirrel.

If you haven’t seen the show, you may not be familiar with this Ninja Obstacle. The mechanism you see in the photo above works in conjunction with a second one to create a swinging obstacle that allows you to act like…well, just like it’s name.


Flying_Squirrel_Obstacle_2


Generally, a series of these are lined up so the athlete can fly from one set of bars to the next. Obviously, this sounds like a high level obstacle, and normally I would categorize it as such when used in a conventional manner. However, sometimes you have to think differently of the products we offer. It’s important to see how each of them can be used as a training tool and not necessarily a means to getting from one side of a frame to another.

In a structured obstacle training environment, the flying squirrel can be used for a massive age range. Now, if it is being placed on a course type environment where kids are simply trying to mow through a series of obstacles then it is limited to a more skilled level.

For example, before kids can learn how to release a bar and grab another, it is imperative they learn a proper swing/tap first. The flying squirrel apparatus is a fun way for kids to practice this swing and even swing and release and drop in to a pit or large resi. We even have options with this obstacle to allow the arms to operate independently of one another (more difficult) or connected to each other (easier).

I love this obstacle and know that it provides a variety of ways to teach body control, coordination, strength, confidence etc. The sensation of one day flying is appealing for kids and adults so I promise you can’t go wrong by including these in your curriculum.


If you have any questions or need details, feel free to to email me at Brad@american-gymnast.com


Posted on Leave a comment

Sport Obstacle Highlight – The Flying Bar Trainer

flying_bar_trainer

While it’s great to have all of the high flying, exciting obstacles you see on the TV show, it’s also important to remember the little novice Ninjas just starting out. No doubt, most of them want to immediately hop up on a salmon ladder or give the 14ft warped wall a go, but obviously that’s not exactly realistic. Of course, there will also be many youngsters that may walk in to your facility and see some of these towering obstacles and get intimidated right from the start.

A great way to alleviate some of the fears of the timid ones and keep the interest of the more ambitious little ninjas is to have a good selection of obstacles that mimic the popular ones but are scaled down to be more of a trainer obstacle. It is important for your program to be unique and consistently varied. But more importantly, you should have trainer obstacles where your younger athletes can learn proper technique in preparation for the show level obstacles.

One example of a popular obstacle that is appealing to kids of all ages is the Flying Bar. Considering the big air and large gaps the athlete has to cross with this obstacle, it is not one for the squeamish. A miss here and it’s a long fall to the ground. This is definitely a high level obstacle that is meant for properly trained ninjas. But, what if the little ones could do something similar that has the same technique but on a much smaller scale?

That’s exactly what our very own Flying Bar Trainer does. Give your novice ninjas some peace of mind knowing there aren’t any huge gaps to cross where they can potentially plummet 10ft. This innovative obstacle allows them to practice the same tap and body movement as the original flying bar, but the solid piece keeps them on the apparatus and keeps their spirits high. Challenge them as they progress by having them hop multiple ridges.

Check out some athletes working out on the FBT:


See more info on the Flying Bar Trainer and other unique obstacles here

Brad Thornton

Posted on Leave a comment

Ninja Frame Options for Every Facility

When you work with a large customer base with facility sizes ranging from 1000 square feet to 80,000 square feet, there certainly isn’t a standard when it come to a Ninja solution. Some clubs are looking to simply fill a small dedicated space with the most efficient and budget friendly setup possible. Aesthetics may not be as big of a concern for these customers. They simply want to get the most bang for their buck and provide a fun and safe course for their Ninjas.

Then their are customers who are really going for a “look.” Functionality is certainly important, but they really want to also present a wow factor for their Ninjas.

Lastly, there is a group that falls somewhere in between. So, how do we serve such a broad range of requirements? Well, we felt it was important to have a framing system that would appeal to each one of these 3 groups. So, we created a 3 tier course solution for our customers


Tier 1: Budget Friendly, Smaller Footprint, Aesthetically pleasing to youth in it’s colorful appearance

Tier 2: Slightly higher in pricing, small footprint. Combines the look of the Tier 1 frame with a TV show like frame

Tier 3: Highest priced of the group, largest footprint. Has the wow factor in it’s large TV show look

Check out the short video on the 3 Frame options:

Check out our full Ninja selection at: http://interactsports.wpengine.com/product-category/sport-obstacles/

If you have design needs or questions, please email me at Brad@american-gymnast.com


Brad Thornton


Posted on Leave a comment

Sports Obstacle Highlight – The Floating Discs

One of the trickier things that comes with designing a Ninja Setup for a client is providing a course that will cover a broad age range and skill level. The majority of people we are designing for have kids that range in age from 4 to 15. So, creativity becomes essential in the design process.

We have to consider 3 main things

  1. It must be fun and safe for the younger kids
  2. It must be fun, safe, yet challenging for the older kids
  3. The course must fit within the client budget

Of course, we could simply recommend a number of our obstacles to keep on hand to swap in and out on the Katana Frame. While it is nice to have additional obstacles so you can keep the course fresh, sometimes this does not work with the budget. So we have to constantly think of ways to be creative with obstacles so they may be used in a number of ways by different age groups.

With all of these thoughts in mind, we created the Hanging Disc obstacle. We wanted to see how we could transform our floating pole obstacle (which the young kids love) to something that the older kids would enjoy as well. Our Floating poles look like the image below:

This is a fun obstacle but there is only one way to use it. So, we decided to shorten the pole to about 15 inches and do a rope connection for the remaining length. This allows us to do the floating poles as well as the very challenging high floating discs. The below photos show the difference between the two:

Low Discs:


Then these low discs can easily be transformed to the high discs by eliminating the rope:


All of a sudden, this becomes one challenging Ninja obstacle! You get two obstacles in one and everybody is happy! You can see more of our sport obstacles here. 

Email Brad@american-gymnast.com for any questions regarding Ninja or to see about our design services


Brad Thornton