No, we certainly don’t have a shortage of “Flying” obstacles. Can you blame us? Who doesn’t like to soar through the air, reaching for a bar, a pipe, rings, whatever? You miss, you land on a big soft resi or in a foam pit. Fun times. I literally spend a good 30 minutes each day just trying to think up different new flying obstacles. So, in comes the flying rings!
We’ve been offering this one for a while but we haven’t really given them their fare share of attention. The obstacle is personally one of my favorites and I often try to encourage clients to consider them. Yes, they appear to be difficult, but once again, like many of our obstacles, there are a number of ways to use them.
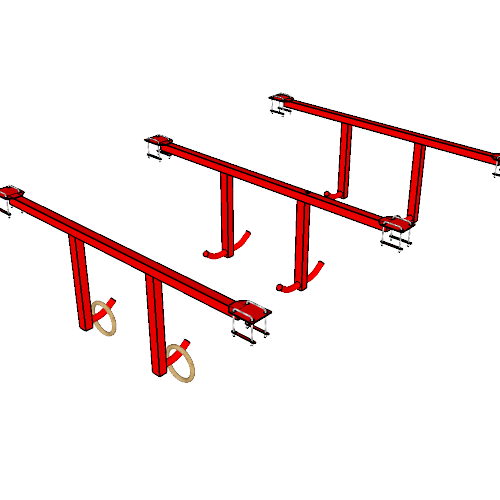
First off, if you watch the show, the obstacle is designed a little differently then what you might expect. Instead of tethering the rings and having the athlete essentially jungle swing from rung to rung, we kept the rings free. In addition, we went with pairs of hooks and rings instead of singles. So, this requires one to swing with both rings in hand and lechè over and loop on to a set of hooks with the rings. Not only does this require body control and precise technique, but it also really brings in the element of mental focus . Once you have launched yourself in to the air, you now have to hone in on these small hooks and stay completely focused on them so that you have a shot at latching on to them with your rings.
“Wait!” you say…”That sounds hard!”
It is! But there are many ways to make it more Ninja novice friendly
- With your youngsters, you can slide the rungs closer together and use the obstacle as more of a ring toss. In other words, the athlete is still hanging from one ring on a peg as they are reaching for the peg across from it.
- You can also start them out on swings only while holding on to both rings – working the proper tapping technique and getting accustomed to the grip strength required to hold on with the extra force from the swing. From there, the athlete can ease in to a swing and release everything all together (including the ring), landing on a resi or in a pit. Next, they can release with ring in hand, learning to get it up and over the bend in the rung. And so on.
- The rungs are designed in such a manner to also allow your athletes to use a bar in lieu of the rings if needed. A bar will be easier in that it requires a little less precision than the rings. So you can have them perfect this before graduating to the rings.
If your more experienced Ninjas need an extra challenge, space the rungs further apart or have them perform the obstacle with one ring only (both hands on one ring). Have them face the opposite direction when they begin so that they have to turn 180 degrees mid air to make the catch. So many ways to do it!
Remember, obstacles like the flying rings can put your athletes in extremely vulnerable positions (including upside down!). It is important to mat appropriately. With obstacles such as this, you will want to go thicker on the safety mat than you would with say a monkey bar at the same height.
Train safely and email with questions or comments. Below is a quick video showing the flying rings.
Brad Thornton
Brad@american-gymnast.com